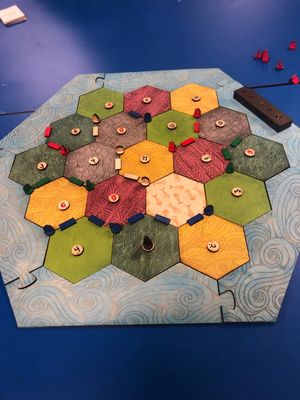
For my final project in my makerspace class last year, I decided to design and laser cut my own Catan board. As a frequent makerspace user and VEX robotics member, the teacher knew me well which is why he gave me free reign to make my own project rather than follow one off the set list.
I started by gathering inspiration and doing research. As it turns out, the piece count for all the different game elements is available online! I found a pdf copy and left it on the desktop of my laptop so I could go black to it over and over again.
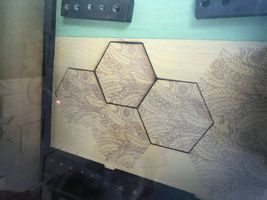
The design of the pieces themselves were fairly simple to me. I used inkscape (a vector based graphic design software used for laser cutting) to make my octagon and then found repeating pattern designs (think adult colouring book) to use as my tile art. If I were to re-do this project, I’d either do my own art, or commission a friend, but at the time this was “just a school project” so I didn’t think too much of it.
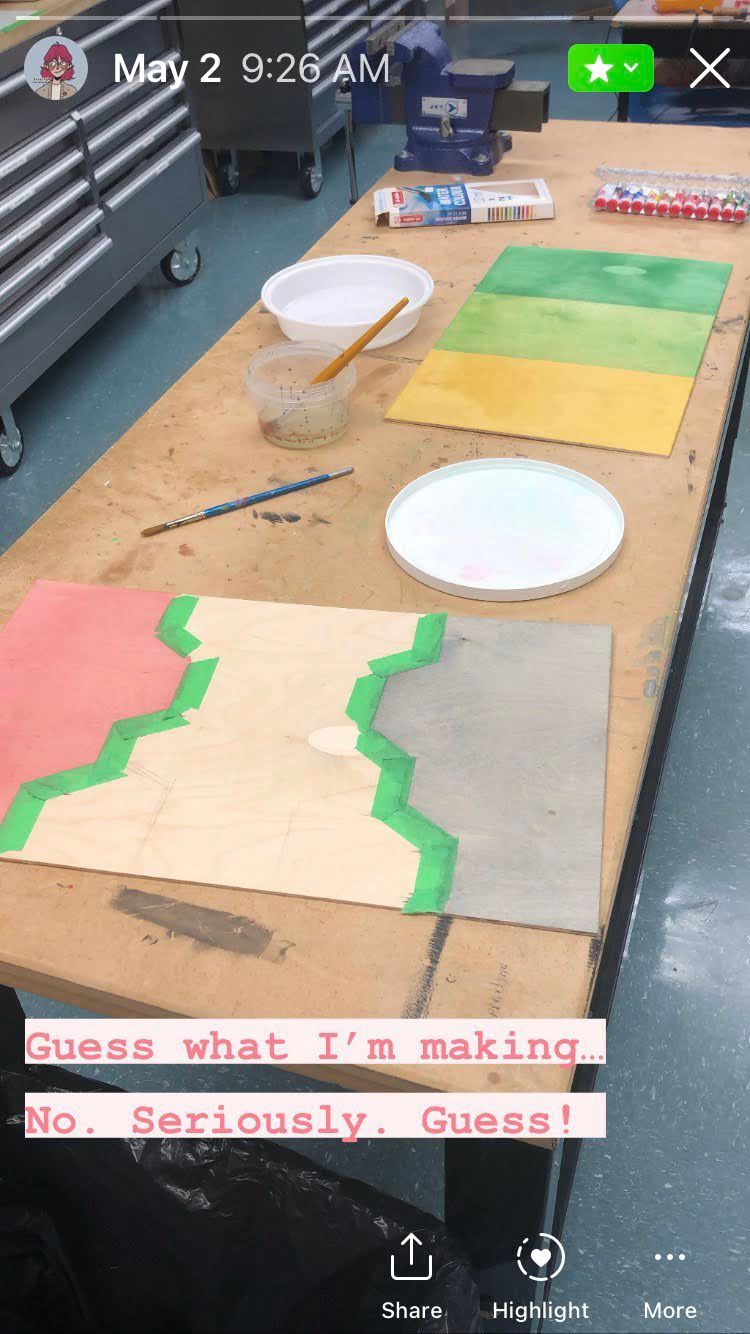
Once my designs were finalised, I formatted them for the laser cutter and moved onto preparing my plywood boards.
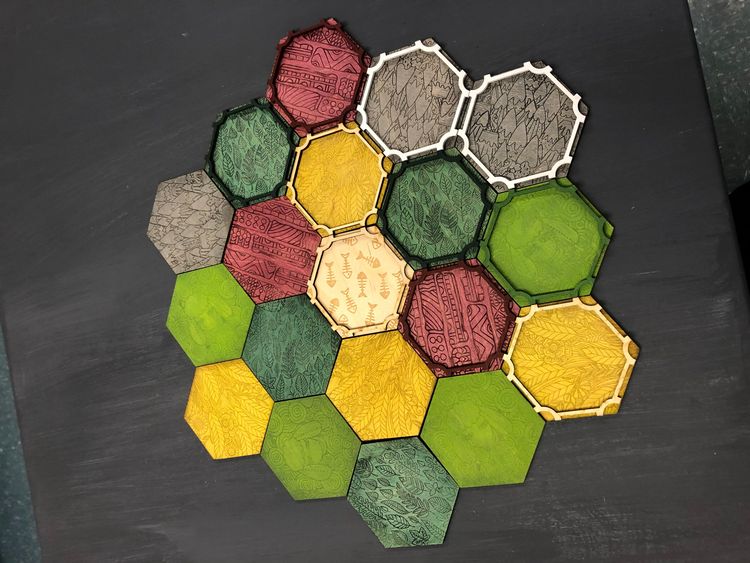
At the suggestion of my teacher, I used watercolour paint to stain the top layer of the wood, then once the pieces were cut and engraved I applied a technique I learned at my sculpture workshop to colour the engraved lines. It worked well for some of the pieces, and really didn’t for others. Turns out, watercolour on plywood does not behave the same as house paint on concrete. I still don’t actually know what I’d do instead! I need to do more experimenting.
After everything was painted and dried, I set it up in the laser cutter and spent the next several classes babysitting the laser cutter. It was fun to watch! Laser cutting is one of those things, like 3D printing, that I’ve been using forever, but that is still cool to me.
I also designed a frame to go around the land tiles, meeple, and circle number tokens.
The final element I’d originally included in my version was a stylized frame to go around each of the tiles, but I abandoned it when I realised I’d have to place and glue each one exactly or my tiles wouldn’t line up properly. Next time I’d engrave the section so that the placement was consistent when I added the frame.