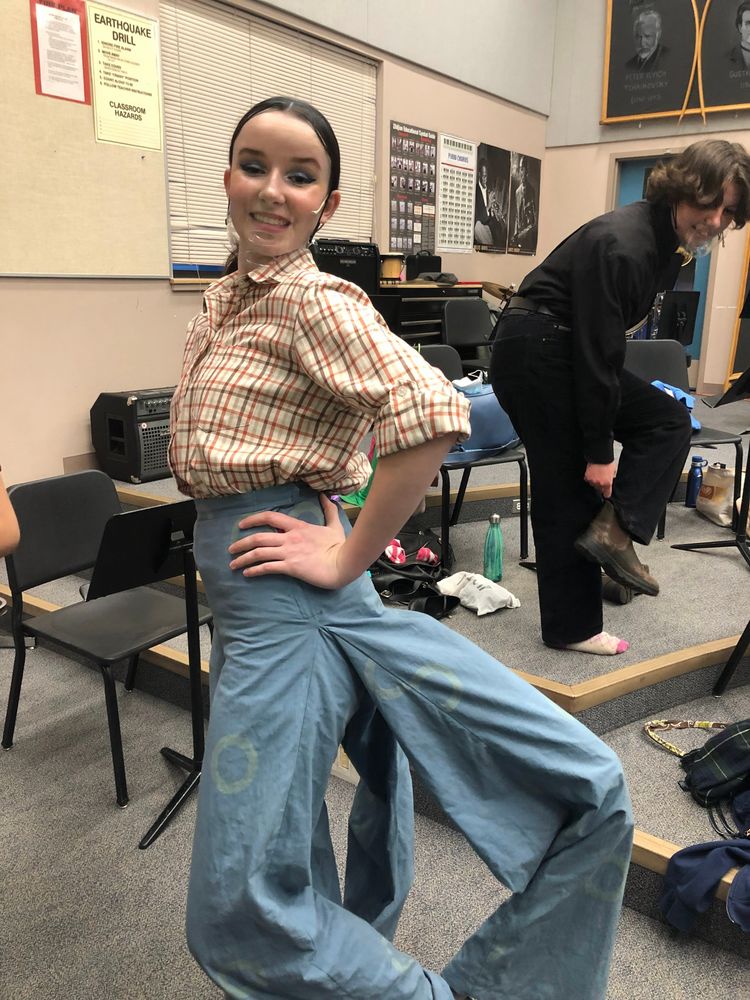
At the end of grade 10, I was approached by my drama teacher to design and make costumes for the coming year's school musical, SpongeBob Squarepants. As a longtime sewer and theatre kid I jumped at the idea! I had exactly NO IDEA what I was doing, but I was excited to give it my all and see where it went. The piece I spent the most time on was the articulated second set of legs for the character Squidward I challenged myself to (re)create. From the minute I saw the promo video for the musical I knew I was perfect for the challenge (I have a unique mix of skills in STEM/mechanical systems and sewing/arts, which lends itself nicely to engineering mechanisms for costumes.)
Before I get into how I approached the problem. We need to take a moment to appreciate how incredible they are. Not only do they look fantastic, but SQUIDWARD TAP DANCES IN THEM!!! Which. Is not easy. For the actor OR the joints in costume...
Chapter 1 - Planning Brainstorming, and the initial idea
I spent the summer and first few weeks of school brainstorming, researching, collecting ideas, and making mini-mockups to test theories. The rights to the show only became available in December of 2020, a whooping 7 months before I started working on it. So, there were almost no resources on the internet to help me figure out how I would approach the project. In robotics we have a saying; "steal from the best and invent the rest." Well, other than a few promo videos on YouTube, there was no "best" to steal from. This lack of resources resulted in a mix of relying on very old Tumblr Cosplay blogs that kinda sorta had the right idea, and a lot of figuring things out on my own.
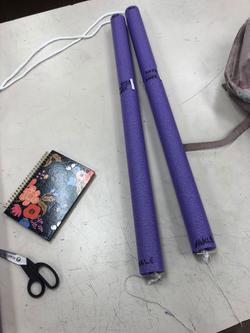
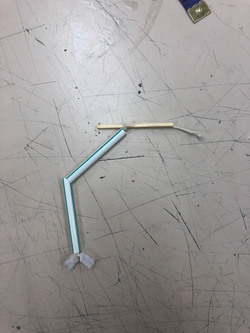
Originally I toyed with the idea of using PVC pipes for the actual legs and using really interesting hinges I found on one of the cosplay blogs, I chose instead to play with threading string through pool noodle sections (which we had a lot of already in the drama room for set decorations, and I felt more comfortable working with them than PVC) to make the "skeleton" with a bendable knee. These "legs" were then tied around the ankle and at the waist so they could move as the actor moved.
Chapter 2 - Drafting the pants
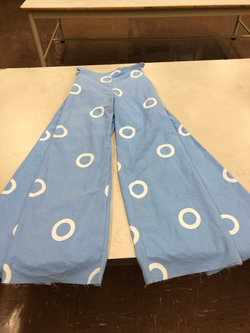
Compared to everything else, the pants were surprisingly easy to make. I've been drafting my own patterns longer than I've been following commercial patterns so the idea of taking pants and adding more legs didn't really intimidate me.
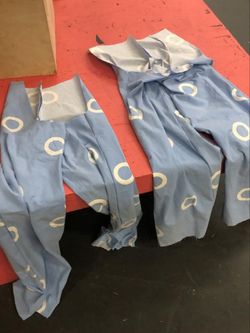
I started with a mini mock up, using a barbie pants pattern to figure out how to add the second set of legs without altering the waist size, and ended up with four kinds of pant pieces in two "groups." Group A was the "front pants," the pants that the actress' legs went into, Group B was the "back pants" that the fake legs went in. So, I had a left and right of each of the following: Front A (the front front of the pants,) Back A (the back piece of group A, basically the back piece from the pattern but with the rise cut off so it ends at the top of the inseam,) Front B (the front of the back, basically the front pattern piece but trimmed like Back A,) and Back B (just the normal back pattern piece.) That was a lot of words, congratulations if you could follow them! I included a diagram below if you're lost but still interested.

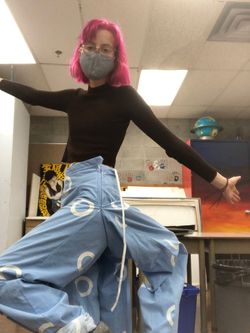
By some actual miracle, the actress playing Squidward has the same measurements as me, which means my job was a million times easier! No Mannequin? No Problem! I was able to make adjustments as I was figuring out the assembly without having to wait for Friday's rehearsal.
I used the Jenny Overalls/Pants pattern as my base, as I was comfortable with the pattern, and thought that two side zippers would come in handy when trying to take them on and off with an extra set of legs in the back (which proved to be right! A front zipper would have made things much more difficult)
Chapter 3 - 3D printing
While the pool noodle and rope design worked in theory, it didn't hold up well in practice. There was a serious lack of tension in the knees, and the legs were very delicate.
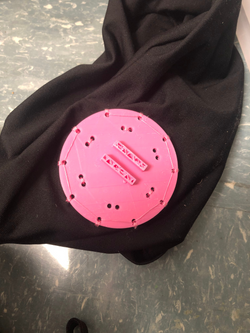
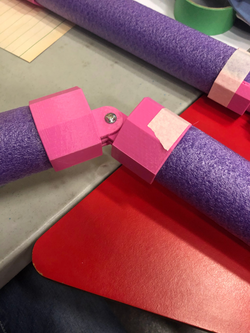
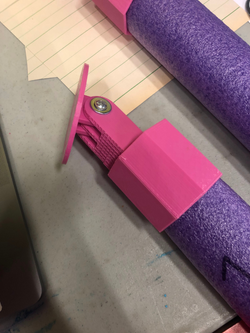
So, I did what any arts/STEM hybrid student would do. I grabbed my laptop and opened Fusion360 so I could design 3D printable joints to use instead. I used a combination of plates (which were sewn into a pair of dance shorts to attach the hips) and cuffs (which press-fit and then were duct-taped to the pool noodle) with finger joints to create the mechanics.
In hindsight. It was a horribly over complicated idea. I would not at all recommend anyone use finger joints for anything as dynamic as legs.
The short answer is because they break easily. And because hot glue, prayer, and tears can only hold so much together.
The long, very nerdy answer is because finger joints work well when you only have one axis of rotation and no side to side pressure. However, when you have legs, that need to tap dance, and move onstage, you have a lot of pressure and force applied in all directions. When your piece is met with repetitive side to side force, the 3D printed layers start to de-laminate from each other which then causes the fingers to snap off. This could potentially be remedied by printing the pieces in a different orientation, but that leads to a whole other set of production issues that honestly could get their own post.
If I were to do the project again and wanted to stick with 3D printed joints, I'd opt for something like ball joints which are harder to model but ultimately are more flexible in multiple directions.
Chapter 4 - Reaching out
My timeline is a little muddled, but I wanted to include this experience for a couple of reasons I'll explore later.
While I was in the thick of my hinge trials, I decided to reach out to the original costume designer for SpongeBob. He'd been in a few of the promo videos I kept coming back to, and after some poking on his website I found his contact form. I reached out with a short explanation of my approach, some photos, and a handful of questions about the original design. I was raised to reach out to interesting people and ask for what I want because "the worst that can happen is they say no or don't reply." So I wasn't completely expecting a Tony Award Winning theatre design professional to get back to a 16 year old girl re-creating one of his costumes. Imagine my absolute delight when he emailed me back!! He was impressed with my design and shared some really helpful information about the struggles they had with Squidward on broadway which helped me adapt my design to avoid the same issues.
As a student who looks up to Mr. Zinn it felt amazing to not only hear back, but to have such a productive and friendly conversation with one of my heroes. I'm constantly surprised when people I think are cool think I'm cool too (especially when they do things like follow my instagram so they can see progress updates.)
My experience with Mr. Zinn seriously shaped not only how I approach reaching out to people I look up to, but also how I make myself accessible so one day young people who admire my work feel like they can reach out to me. At the end of the day, people are just people, no matter how cool you think they are.
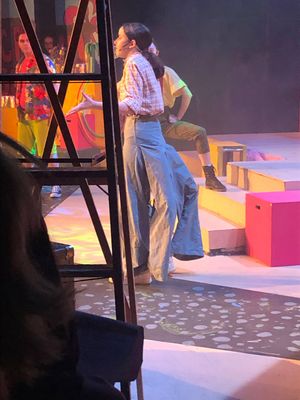
Chapter 5 - The Final Product
I had a whole month and a half of dead ends while I tried to figure out multiple pairs of shoes, feet, and ankles which I will not be covering here for the sake of my sanity (if you're interested, I documented the whole process on my instagram! @maker_sophia look for the "Squidward" highlight.) So we're going to jump straight to the final product.
In the end, I connected the 3D printed hinges to the pool noodles at the hips and knees, and then tied elastic through a loop in the bottom of the pool noodle "ankles" which connected to the actress' ankles. The system still had several major problems in regard to stability and the ratio of times it had broken vs held up through a rehersal, but I'd reached my deadline. So with the help of an exhaustive pre-show check up and a bin of "if anything goes wrong" supplies on hand, we made it through show week with no issues during the performances.
So.. I guess you could call it a success! It was FAR from perfect. But for a 16 year old who basically made the whole thing up as she went (and learned. So. Much. in the process.) I think I did pretty well!
The magic of theatre is that once the last show was over, that was it. It was time for a new project. But I do wish I'd had just a little bit more time to work out the kinks in the design before the show wrapped.
If you want to see a more in depth explanation of my process, check out the story highlight on my instagram! I posted progress updates and thoughts all along the way